Showing posts with label baking. Show all posts

Tuesday, May 22, 2012

Raspberry-Chocolate Theme

Apparently I've been enchanted by the combination of raspberries & chocolate lately, even though I just put that together.  Game of Thrones night ended up being postponed on Mother's Day, but I'd already began the cupcake baking process...luckily my roommates stepped up & offered to help take care of the excess. :)


The look like your ordinary chocolate cupcakes (& who would complain about that?!), but hidden inside is a tart raspberry filling:

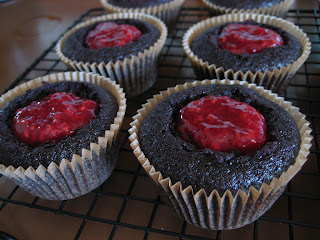

They were so, so good.  I still have more raspberries in the freezer from last year's Sauvie Island berry-picking adventures, so maybe I can come up with one more chocolate-raspberry treat...

More recently, as in last night, my friend Megan & my sister wanted to have a themed dinner, since Megan is moving back to the Midwest soon.  They came up with "Vegan Breakfast Dinner", so Megan made waffles & sliced strawberries, my sister made her famously crispy potatoes & tempeh bacon, & I brought raspberry sauce & Nutella (chocolate & raspberry, for the win!).

The glorious spread:


My monstrosity:


I should probably share the Nutella recipe I used, which is from Veganomicon, a cookbook essential for living a good life. <3  I also want to try this recipe sometime, though it seems way more complicated. 

Not-tella
  • 5 ounces toasted, skinned hazelnuts (a generous cup)
  • 8-10 tablespoons neutral-tasting oil
  • 3/4 cup, plus 2 tablespoons powdered sugar
  • 1/4 cup cocoa
  • 1 1/2 teaspoons hazelnut extract (still good without this)
  • 1/4 teaspoon vanilla
I don't follow the directions in Veganomicon exactly, because I've had better results by blending the hazelnuts & oil (start with smaller amount, adding more if necessary) in a blender until creamy.  (A Vitamix is ideal, if you or someone you know has one.)  Slowly add the powdered sugar & cocoa, scraping down the sides of the blender as necessary.  Add the extracts & blend until smooth & creamy.  Enjoy it warm from the blender, or chill it for a thickened, spreadable treat.   

Bonus sleeping kitty shot!  Yoda almost looks innocent here, but don't let him fool you...


Wednesday, August 24, 2011

Coral & Ryan Get Hitched!

Wow, this has been an amazing process, & now it's time to relax! Coral has spent so long planning her & Ryan's beautiful day, & it sure paid off. Everything was lovely & perfect in the end!

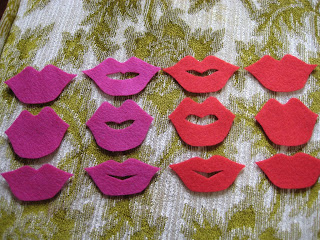
I'll start out with the prep work that I was responsible for. Ryan & his awesome friend, Chris, built a photo booth from scratch! Coral asked me to make some silly props for it. It took a while to get the method down, so I started on the simplest pieces, the lips.

Here's the first batch, on our trippy green couch:


The felt wasn't stiff enough to hold up on it's own, so I ended up painting them with diluted wood glue & letting them dry. Then I hot glued them to sticks. Some shapes were easier to cut with scissors, while others (especially the glasses) were easier with the Exact-o knife. For the glasses, I actually painted entire sheets of felt with the watered down glue, then let it dry before cutting them out. I'm not exactly sure of the method the people who sell them on Etsy use, but you couldn't pay me to sell these things, ha ha!


I was also asked to cut a couple dozen burlap table runners. Good thing we have a big basement crafty area now! It's not easy to find 10 ft. of blank space for cutting fabric. :)

Ready to be delivered to Coral:


My biggest contribution to the wedding was in the form of baked goods. Coral wanted 125 or so cupcakes, half carrot cake w/orange cream cheese frosting, & half traditional butter cake w/chocolate frosting. She also wanted 150 lemon bars, but they only needed to be a square inch, so that wasn't too bad.

The recipe I used for the lemon bars is available here. I've used it before. I really like the texture of the bars & they aren't as "wet" as traditional ones, so they won't get weepy & soggy.

What got me was the last-minute cutting & frosting! I baked the lemon bars & carrot cupcakes the day before, & also prepped the frosting, but wanted to wait till the day of the wedding to bake the butter cupcakes. Rose Levy Beranbaum, goddess of baking, recommends serving them on the day you bake them, so I wanted them to be as fresh as possible.

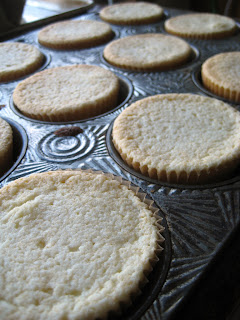
Here's the first dozen, fresh from the oven.


The recipe I used was for Downy Yellow Butter Cake from the Cake Bible. I used 3 tablespoons of batter & baked them @ 350*F for about 28 minutes. Even though I'm a baker, I don't really love cake that much. I'd much rather have some chocolate or a cookie, but this recipe is so amazing. It's light & fluffy, with such a deliciously sweet buttery flavor. I'd even prefer it plain, or with some macerated fruit on top. Mmmmm...

Here's some of the frosted lovelies:


The carrot cake recipe was an original that I've tweaked over the years at work. I added raisins & walnuts to these, but coconut &/or pineapple would also work. Yes, the recipe is eggless! It's also great with soy milk in place of dairy, for a vegan version.


Carrot Cake with Orange Cream Cheese Frosting
  • 1 1/4 cups flour
  • 1 1/8 tsp. baking soda
  • 1/4 tsp. plus 1/8 tsp. baking powder
  • 1/4 tsp. plus 1/8 tsp. salt
  • 1/4 tsp. plus 1/8 tsp. cinnamon
  • 1/4 tsp. plus 1/8 tsp. ground ginger
  • 1 cup sugar
  • 1/3 cup oil
  • 1/2 cup milk with 3/4 teaspoon lemon juice added (or buttermilk)
  • 1 1/2 teaspoons vanilla
  • 1 1/2 cups finely grated carrots
  • 1/3 cup raisins
  • 1/3 cup chopped walnuts
Frosting:
  • 8 oz. cream cheese, softened
  • 1/4 cup unsalted butter, softened
  • 1 cup powdered sugar
  • pinch of salt
  • zest of 1/2 an orange

Preheat the oven to 350*F. Line a 12-cup cupcake pan with paper cups & set aside.

In a small bowl, whisk together the flour, baking soda, baking powder, salt, cinnamon & ginger; set aside.

In a large bowl, whisk together the sugar, oil, milk, vanilla, carrots, raisins & walnuts.

Add the dry ingredients to the wet ones & mix until combined. Scoop 3 tablespoons of batter into each paper cup. Bake for about 25 minutes, or until a toothpick inserted into the center comes out clean.

There will be enough extra for another cupcake or two, or a baby cake for the baker!

Cool completely, before frosting generously. To make the frosting, whip all the ingredients together. Try not to eat it by the spoonful!

****************************************

And here are some pictures of the payoff of so much hard work by so many incredible people! I would have taken more pictures, but I was helping to set up, then had to get bedecked in my bridesmaid attire.

First of all, here is the beautiful bride. Did I mention that she made her entire dress herself?! One of her sweet neighbors happens to be a retired professional seamstress & she was a godsend! Coral also sewed the two flower girls' dresses, & all the bridesmaids' dresses. There is nothing she can't do!

Coral & Smels:


Smels literally teared up at Coral's beauty! :')


Here's a shot from under the tent. Look at the beautiful place settings! And I spy my old frenemy, Mr. Burlap! See the little jars of light & dark honey that we got as wedding favors?


And now for the dessert table, which was breathtakingly beautiful, thanks to Coral's thoughtful planning. I was honored to have my baked goods be a part of something so stunning. One of her friends from work, who does some catering, baked chocolate chip cookies too!

At this point, we were in the process of setting the cupcakes out at the last possible minute, since it was so hot out. The poor babies already had a long trip in the hot trunk of my (no air conditioning) car, so they were nervous to be displayed! We set 2 or 3 on each antique, floral saucer.


This sort of shows the left side of the table:


And this shows the right side:


I almost forgot to mention the cake! Coral wanted something tiny & rustic, so her & Ryan would have something to cut & shove into one another's face (lovingly, of course!). You can see the frosting was getting that glossy, I-want-to-melt-but-I-won't look to it. Thankfully, it held up for the whole evening! Whew!


Smels & Ethan show wear from too much good food & booze:


I'll end with a couple of photo booth pictures. Outside the booth, there was a table set up with a scrapbook, markers, glue sticks & scissors, so guests could leave a cute picture & note for the newlyweds.

Ethan & I:


Smels & I:


We love you, Coral & Ryan! Congratulations on your new life together!

Tuesday, August 16, 2011

We Moved!

Again, it's been awhile since I posted. So much has happened, including a big move from Southeast to North Portland, so we were really busy settling in. It's SO NICE to live in an actual house, rather than an apartment. We had forgotten what it's like to sleep through the night, as we'd had horrible upstairs neighbors for the longest time! Now, instead of living around a bunch of self-entitled hipsters, our neighbors are super friendly & down-to-earth. Yay!

Shortly after moving, my siblings & I went on our annual camping trip, this time to Champoeg, one of my favorite camping spots evar!

We took our time at camp, after surviving an indecent rush-hour trek to Champoeg. Sean munches a Tofurky-avocado bagel, in recovery:


Smels was impressed with her mustard skillz, & had to get photographic evidence:


Friday night, we went down to check out the beautiful river.


A confession: my biggest fears in life are drowning, & having big fish touch me in the water(so irrational, I know! I hope to conquer these neuroses before I die!), so I wasn't keen on diving in, but the next day, after we walked a few miles to the Butteville Store, Sean asked if he could swim in the freezing, murky, Willamette. My sister, the voice of reason, said she thought it was okay, so he bravely waded in. This is one of my favorite pictures ever. Such cuteness!


We also walked to an old grave site & found an orchard with pear, apple & hazelnut trees. Smels spotted this picturesque ladybug. Way to strike a pose, gurrlll!


We also found some shelf fungi along the trail, home to behbeh slugs!


I brought a pie, baked from these delish raspberries from Sauvie Island.


We had zero trouble eating it all up. I used a recipe from CHOW as the base, but modified it a little bit, for pure raspberry delight.


Raspberry Pie
  • 2 1/2 cups flour (I used half white whole wheat & half white)
  • 1/2 teaspoon kosher salt
  • 1 cup, plus 2 tablespoons cold, salted butter
  • 6-8 tablespoons ice water, mixed with 2 teaspoons lemon juice
  • 6 cups raspberries
  • 1 cup sugar
  • 1/4 cup cornstarch
  • 1 tablespoons lemon juice
  • zest of one lemon
  • milk for brushing crust, plus sugar for sanding (optional)
Mix together the flour & salt. Cut the butter into it, until sandy, with small, pea-sized balls of butter. Add the minimum amount of water necessary to get the dough to hold together. Try not to overwork it! Divide dough into two disks, then refrigerate them till chilled.

In a separate large bowl, mix together the berries, sugar, cornstarch, lemon juice, & zest.

Preheat the oven to 375*F. Roll out the pie crusts to 1/4-inch thickness. Line the bottom of your favorite pie tin with one of the crusts, leaving the extra dough hanging around the edge.

Pour in the filling. Top with the other half of dough. Trim the edges, but leave about an inch extra around the outside. (Save the extra tidbits for turnovers, or cinnamon-sugar munchies!) Turn the dough under, then crimp/decorate in your own way.

Brush the top with milk & sprinkle with sugar, if you like it that way. Cut a few slits in the top, then bake until the crust is golden & the filling is bubbling out the slits. If the crust begins to brown too quickly. cover it lightly with foil. Let cool before cutting, or it'll be soupy!


Here's the jam I made with those same raspberries! It's made with only three ingredients: raspberries, honey & Pomona Pectin.


Fun! Fun! Fun! I also want to recommend the OMSI exhibit, "Game On", to any gamers out there. We took Sean & had a blast. There were SO MANY CONSOLES, from all around the world, most of which were playable. My brother & I even played PONG, which was projected onto a huge wall. I took a bunch of pictures before I saw the "no pictures" signs that were posted in randomly weird areas. It was hard to notice them through the herds of kids & flashing lights, but I stopped once I saw them. Oops! I feel like an asshole, since people who saw me snapping away must have been like, "This lady thinks she's too cool for school..."


Hello there!


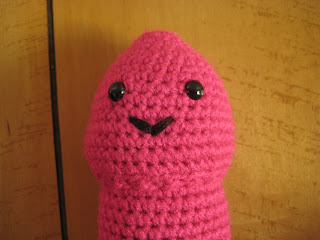
I just had to share this amigurumi schlong that I made for Coral's bachelorette party. A bunch of us ladies went on a limo-driven wine tour around 5 or 6 vinyards (I lost track after awhile), which is hilariously unlike me, but it was fun. The peen is from Anticraft, but I used worsted weight Red Heart yarn. I didn't make the taint. It looked weird, so I frogged it out & just sewed the shaft & balls together. He seems happy, even though he's taintless.


Here's the beautiful bride-to-be. Her feather boa kept shedding all over, ha ha.


Hope everyone is having a good summer! I can't wait to share photos from Coral's wedding! See you soon...

Friday, May 20, 2011

Gardening & Baking Cookies

Ethan is going to visit his parents this weekend, while I suffer with gobs of homework, so I made some cookies for Cathy & David. These are vegan chocolate chip cookies, which are just a veganized version of the Toll House recipe. So good! I make these all the time at work.


Vegan Toll House Cookies
  • 2 1/4 cups flour
  • 1 teaspoon baking soda
  • 1 teaspoon salt
  • 1 cup margarine, softened
  • 3/4 cup sugar
  • 3/4 cup brown sugar
  • egg replacer for 2 eggs (I use Ener-G)
  • 1 teaspoon vanilla
  • 2 cups chocolate chips
  • 1 cup nuts, optional
Preheat oven to 375*F. In a small bowl, whisk together the flour, baking soda, & salt; set aside. In a stand mixer, cream together the margarine, sugars, egg replacers, & vanilla; beat till light & fluffy, scraping down the side of the bowl a couple times. Add the flour mixture to the mixing bowl; mix until combined. Stir in the chocolate chips & nuts. Place 2-tablespoons-sized balls of dough on a cookie sheet, spacing them a couple inches apart. Bake for 8-10 minutes, letting them cool on the sheets before removing.

*****************************************

I had to get a few pictures of the garden. It's so sunny today & everything is growing like mad!

Here's some of the mint, hanging with its gnome guardian:


Begonia & Salvia flowers:


Violets:


Enjoy the day, wherever you are!

Sunday, January 9, 2011

Whoa, it's Been a Month!

Like everyone else, I was super busy over the holidays, so blogging wasn't high on my list of priorities. I was lucky enough to have the opportunity to spend time with friends & family before getting sucked back into the Winter term of school.

Sean came out for a few days, so we headed to Mt. Tabor, our usual funtimes place!


Here's Smels & Mom's new-ishly adopted cat, Motley, who is finally getting brave enough to come downstairs from his lair.


Here's our cute Momma, who is known to shield her face with an alien vag when she sees a camera. Just kidding, she was actually repairing this alien figurine that she got for my stepbrother.


I wanted to share some of the recipes I made for gift-giving, since they were pretty delish!

Here are most of the plates I made for peeps. Instead of buying new ones, I got them at Goodwill. Much better to re-use ones that are already floating around the world, I say! There were Strawberry Jelly Dot Cookies, Chewy Gingerbread Trees, Chokeballs (Mexican Wedding Cookies), English Toffee & Honey Caramels. SO. MUCH. SUGAR.


Here's what the finished product looked like. I used these cute, printable labels & a little ribbon for flair.


Rows upon rows of honey caramels! I couldn't believe how long it took to wrap them all, but luckily I was watching Law & Order: Criminal Intent, w/my main man, Vincent D'Onofrio.


I found the recipe here. The only things I did differently were to substitute honey for the corn syrup &, since I didn't have fleur de sel, I used kosher salt instead; despite panicked warnings on the internetz against using honey for candy-making, it worked perfectly, so yeah.

Honey Caramels
  • 1 cup heavy cream
  • 5 tablespoons unsalted butter, cut into pieces
  • 1 teaspoon kosher salt
  • 1 1/2 cups sugar
  • 1/4 cup honey
  • 1/4 cup water
Butter a square baking pan & line the bottom w/parchment, buttering that as well; set aside. In a small saucepan, bring the cream, butter & salt to a bowl; set aside.

In a heavy-bottomed, medium saucepan, boil the sugar, honey & water, stirring until sugar is dissolved (try not to splash the sugar up on the sides of the pan!). Boil, without stirring until mixture is a light golden color, gently swirling the pan occasionally.

Pour the cream into the caramel, being careful not to get splashed by the sputtering brew. Stick your candy thermometer on the side of the pan (don't let it touch the bottom though!) & simmer, stirring frequently, until mixture reaches 248*F.

Pour caramel delight into your prepared pan & let sit at room temp. until completely cooled. Once cool, cut into 64 pieces & wrap in 4-inch squares of wax paper. Be careful when you twist the sides, or you'll tear the paper. It gets easier as you go, especially if you watch Criminal Intent!

*****************************************

Another recipe that I make EVERY year is my Gran's Jelly Dot Cookies. The original recipe was from a Nucoa margarine package, hee hee.

Jelly Dot Cookies
  • 1 cup butter, melted
  • 1 1/2 cups brown sugar
  • 2 eggs
  • 2 teaspoons vanilla
  • 3 cups flour
  • 1 teaspoon salt
  • 1/4 teaspoon baking soda
  • 2 cups finely chopped walnuts, for rolling
  • 1 cup jelly or jam of your choice (strawberry & raspberry are faves here)
Preheat oven to 350*F. Beat butter, sugar, eggs, & vanilla until smooth & slightly thick. Combine dry ingredients in a separate bowl, then add them to the first mixture, stirring until thoroughly mixed. If dough is too soft, chill it until it is workable. Form the dough into 1-inch balls, then roll them in the chopped nuts. Place them on a cookie sheet, about 1 1/2 inches apart. Bake for 10 minutes. Remove from oven & use your thumb (you may have to wait if you don’t have “asbestos fingers”) to make a dent in the center of each cookie. Then fill the dent with jam or jelly. Place back into the oven for 3-5 minutes, or until lightly browned, then devour these addictive beasts!

*****************************************

Chokeballs
  • 1 cup butter, softened
  • 1/2 cup powdered sugar
  • 1 teaspoon vanilla
  • 2 1/4 cups flour
  • 1/4 teaspoon salt
  • 3/4 cup finely chopped nuts (walnuts or pecans are tasty)
  • powdered sugar for rolling
Preheat oven to 350*F. Cream the butter, powdered sugar & vanilla until light. Add the flour & salt & stir until combined, then stir in the nuts. Roll mixture into 1-inch balls. Place on a cookie sheet (don't worry, they won't spread much at all) & bake for 15-20 minutes. Remove from oven & roll in the powdered sugar. Let cool, then re-roll them. Sometimes I give them a third roll, if I'm feeling saucy.

*****************************************

These next cookies were a first for me, but they were very good! I got several compliments on them, so I plan on making them again next year. The only thing I would change would be to add more salt to them. I made the dough a little differently too...

Chewy Gingerbread Cookies
  • 12 tablespoons butter
  • 3/4 cup brown sugar
  • 3/4 cup molasses
  • 2 tablespoons milk
  • 3 cups flour
  • 1 tablespoon cinnamon
  • 1 tablespoon ground ginger
  • 3/4 teaspoon baking soda
  • 1/2 teaspoon cloves
  • 1/2 teaspoon salt (1 would double this next time)
Cream the butter, brown sugar & molasses until creamy. Add the milk & try to blend until it emulsifies as much as possible. In a medium bowl, combine the remaining ingredients & whisk them or sift them until they're blended. Slowly add them to the creamed mixture, stirring just until combined. Dough will be pretty sticky. If it's too sticky, chill it before rolling. If it's workable, roll it out, with a teensy bit of flour, until it's 1/2-inch thick. Wrap & chill for a couple hours or overnight.

Preheat oven to 350*F. Use cookie cutters to cut desired shapes & quickly put them on a cookie sheet (an inch & a half apart); bake for 8-12 minutes, rotating sheets halfway through. They are done when a gentle finger pressed into the center barely retains a fingerprint. One sheet of mine was a bit underbaked, so I put them back in for a couple minutes, which worked just fine. If you cook them too long, they won't be chewy, but they'll still taste good!

*****************************************

English Toffee
  • 1 cup butter
  • 1 cup sugar
  • 1/3 cup brown sugar
  • 2 tablespoons water
  • 6-8 ounces dark or milk chocolate for spreading (amounts depend on taste)
  • about 2 cups finely chopped nuts for sprinkling
Line a sheet pan with parchment & set aside. In a heavy-bottomed saucepan, melt the butter; add sugars & water. Stir, over medium heat, until it reaches a boil. Turn heat to somewhere between medium-low & medium. Don't stir very often, or you could summon the dreaded ~crystals~.

Stick your trusty candy thermometer on the side of the pan, careful to not let it touch the bottom. When the mixture reaches 300*F, it's ready. Pour it onto the parchment, WITHOUT SCRAPING THE PAN. There will be some candy left in there, but if you scrape the sides, you risk incorporating some sugar crystals into your toffee, which could cause the whole thing to crystallize. I know, it's a high stress situation, this toffee-making, but it's worth it. You can sort of lift & tilt the cookie sheet & allow the mixture to spread a bit, if you want it thinner.

Once it cools, melt some chocolate & spread it on the toffee. Sprinkle some chopped nuts on top of the chocolate, pressing them into it. Let the chocolate harden, then turn it over & repeat the process on the other side. When that side is hardened, break it into pieces & try not to eat it all!

*****************************************

I didn't even have time to take pictures of all the projects I made, since I was down to the wire, but here are some cute, felted nesting bowls I made for Rod & Anna. I love the colors & want to make some for our house too!


Yesterday, Smels came over, so I could show her the Wii---yeah, I've wanted one since they came out, & I couldn't resist any longer! :) I made her some Jammers, which are her favorite treat from Grand Central. She said they were perfect, yay! I didn't cut the jammers into circles, because I didn't want to deal with scraps. It just seemed simpler to form the dough into a rectangle, then cut it into 12 squares.

Before baking:


Grand Central Bakery Jammers
  • 4 cups flour
  • 3 tablespoons sugar
  • 2 teaspoons baking powder
  • 1/1/2 teaspoons salt
  • 1 teaspoon baking soda
  • 1 cup cold unsalted butter, cut into pieces
  • 1 1/4-1 1/2 cups cold buttermilk (I squeezed the juice of one lemon into a measuring cup, then topped it off with 2% milk)
  • about 3/4 cup jam (I used peach-lavender & strawberry)
Preheat the oven to 350*F. Line a baking sheet w/parchment & set aside.

In a large bowl, combine the flour, sugar, baking powder, salt & baking soda. Add the butter pieces & work it into the dry ingredients until teh mixture is mealy, with some quarter-sized pieces of butter remaining. Try not to let it get warm from your fingers; work quickly & pop it into the fridge if you think it's getting warm.

Pour 1 1/4 cups buttermilk onto the flour/butter mixture & work it in with your fingers. It's should be pretty dry, but hold together (sort of like a drier pie dough). If necessary, add more buttermilk, a tablespoon at a time.

Dump dough onto your counter. Pat it into a rectangle that's about 2 inches thick. Cut into 12 squares with a sharp knife. Carefully transfer the squares to your baking sheet (they're flaky & delicate at this point), spacing them about 1 1/2 inches apart.

Use your thumb to make an indentation into the jammers, & fill them with about 1 tablespoon of jam. Bake for 35-40 minutes, rotating the baking sheet halfway through. They're done when they reach a deep golden color.