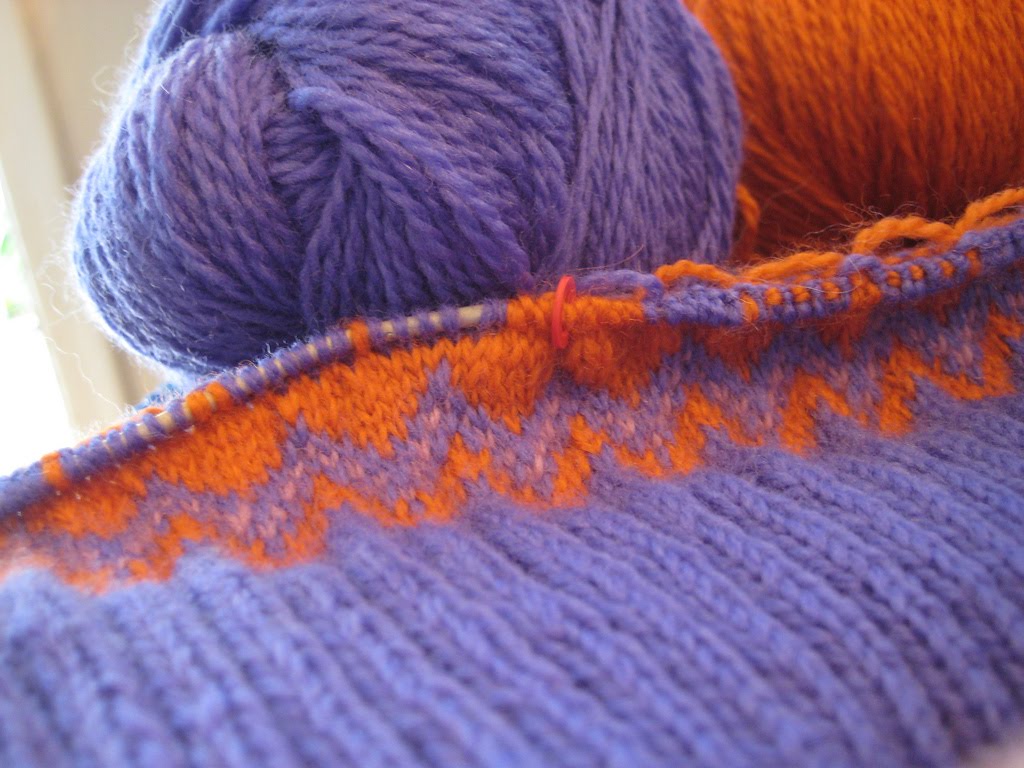
It's Spring Break, all my friends have real jobs, & Ethan's visiting his parents, so to stave off loneliness, I've been super crafty. Because I wanted to challenge myself, I decided to make my second ~*real*~ sewing project, which is a ginormous grocery bag. It's sewn so sloppily (think *seam of allowance of anywhere from 1/8" to 1/2"*, seriously), but I love it. :) It's so goddamn huge, ha ha. Ethan promised to go to the Farmer's Market with me next weekend, so we'll put her to the test & see how much kale she can hold!
 It's lined with the same pink gingham fabric that I used on my owl apron.
 This space puzzle of Ethan's has been hogging the "craft table" for several months, so I decided to finish it & reclaim my rightful surface. He did about 85% of it, then petered out when there were tons of black pieces left over. It was fun to listen to Car Talk & wrap this up. Then I Mod Podged it, so Eth can hang it in his room. It glows in the dark!
 We had this rickety, nondescript shelf lying around, so I tipped it over, pounded about 10 nails into it, then decided it needed to have a more glamorous look. I used this awesome Etsy creation by pixlpshr as inspiration, but changed it up a bit.

I think it's much cuter & works perfectly for my old NES & N64 games.  Lastly, my obsession with kitchen towels led me to start this cute towel, but I botched the pattern I was working on, so I'm just making a mutation of several towel patterns together...

I've been neglecting the ol' blog again. The cloudy Winter months tend to put me into a semi-funk, but I've been getting back into running again---it's been a couple years! I'm doing the Couch to 5K again, but this time, I'm using the Running Mate podcast, which I love! It's got some funny electronica (?) music & the host, Todd, is super motivational. Now I'm able to jog for 12 minutes at a go. :) Here I come, week 7! (A couple of friends are doing it too, but we're on different weeks.)
Ethan & I found some roller skates for me, & roller blades for him, at Goodwill. So fun. I'll spare you the pictures though. Let me tell you that roller skating in the apartment, after a 20-year hiatus, was a blast!!!
Yesterday morning, it was actually (temporarily) sunny here, so I made pancakes for us. They're a rare treat, mostly because I don't like standing around waiting for all of them to cook. The half batch is your friend, by the way. I used this recipe, & added some frozen blueberries. Mmmmmm...

Blueberry Buttermilk Pancakes
- 2 cups flour
- 2 tablespoons sugar
- 2 teaspoons baking powder
- 1/2 teaspoon baking soda
- 1/2 teaspoon salt
- 1 large egg
- 3 tablespoons cooled, melted butter
- 2 cups buttermilk
- 1 cup blueberries (fresh or frozen)
Get your cast iron pan going. Everyone should know their stove's ~*special pancake temperature*~. Ours is one notch below medium.
Whisk together the flour, sugar, baking powder, baking soda, & salt in a large bowl. Make a well in the center, & add the egg, butter, & buttermilk. Whisk everything together, but don't over-mix! Perfect, fluffy pancakes are the result of semi-lumpy batter, trust me. Fold in the blueberries.
Add a little butter to your skillet, spread it around, then pour some batter on that. Flip it when you see bubbles coming up through the pancake. Cook for another minute or so, then eat it up! Repeat till batter is gone, or you are tired of making pancakes.
*****************************************
I have so many people with February birthdays, so I got a couple new stamp sets & made this card for a few of them. There was a blue version too, but I didn't take pics. Robo-luv...
 I finally finished my Feet Eaters too!
 They are so damned cute. I want to make some for others, but all the finishing wore me out. I don't like sewing on little tidbits, even when the resulting product is awesome. Maybe after a break though...
 Happy crafting!
Like everyone else, I was super busy over the holidays, so blogging wasn't high on my list of priorities. I was lucky enough to have the opportunity to spend time with friends & family before getting sucked back into the Winter term of school.
Sean came out for a few days, so we headed to Mt. Tabor, our usual funtimes place!

Here's Smels & Mom's new-ishly adopted cat, Motley, who is finally getting brave enough to come downstairs from his lair.
 Here's our cute Momma, who is known to shield her face with an alien vag when she sees a camera. Just kidding, she was actually repairing this alien figurine that she got for my stepbrother.
 I wanted to share some of the recipes I made for gift-giving, since they were pretty delish!
Here are most of the plates I made for peeps. Instead of buying new ones, I got them at Goodwill. Much better to re-use ones that are already floating around the world, I say! There were Strawberry Jelly Dot Cookies, Chewy Gingerbread Trees, Chokeballs (Mexican Wedding Cookies), English Toffee & Honey Caramels. SO. MUCH. SUGAR.
 Here's what the finished product looked like. I used these cute, printable labels & a little ribbon for flair.
 Rows upon rows of honey caramels! I couldn't believe how long it took to wrap them all, but luckily I was watching Law & Order: Criminal Intent, w/my main man, Vincent D'Onofrio.
 I found the recipe here. The only things I did differently were to substitute honey for the corn syrup &, since I didn't have fleur de sel, I used kosher salt instead; despite panicked warnings on the internetz against using honey for candy-making, it worked perfectly, so yeah.
Honey Caramels
- 1 cup heavy cream
- 5 tablespoons unsalted butter, cut into pieces
- 1 teaspoon kosher salt
- 1 1/2 cups sugar
- 1/4 cup honey
- 1/4 cup water
Butter a square baking pan & line the bottom w/parchment, buttering that as well; set aside. In a small saucepan, bring the cream, butter & salt to a bowl; set aside.
In a heavy-bottomed, medium saucepan, boil the sugar, honey & water, stirring until sugar is dissolved (try not to splash the sugar up on the sides of the pan!). Boil, without stirring until mixture is a light golden color, gently swirling the pan occasionally.
Pour the cream into the caramel, being careful not to get splashed by the sputtering brew. Stick your candy thermometer on the side of the pan (don't let it touch the bottom though!) & simmer, stirring frequently, until mixture reaches 248*F.
Pour caramel delight into your prepared pan & let sit at room temp. until completely cooled. Once cool, cut into 64 pieces & wrap in 4-inch squares of wax paper. Be careful when you twist the sides, or you'll tear the paper. It gets easier as you go, especially if you watch Criminal Intent!
*****************************************
Another recipe that I make EVERY year is my Gran's Jelly Dot Cookies. The original recipe was from a Nucoa margarine package, hee hee.
Jelly Dot Cookies
- 1 cup butter, melted
- 1 1/2 cups brown sugar
- 2 eggs
- 2 teaspoons vanilla
- 3 cups flour
- 1 teaspoon salt
- 1/4 teaspoon baking soda
- 2 cups finely chopped walnuts, for rolling
- 1 cup jelly or jam of your choice (strawberry & raspberry are faves here)
Preheat oven to 350*F. Beat butter, sugar, eggs, & vanilla until smooth & slightly thick. Combine dry ingredients in a separate bowl, then add them to the first mixture, stirring until thoroughly mixed. If dough is too soft, chill it until it is workable. Form the dough into 1-inch balls, then roll them in the chopped nuts. Place them on a cookie sheet, about 1 1/2 inches apart. Bake for 10 minutes. Remove from oven & use your thumb (you may have to wait if you don’t have “asbestos fingers”) to make a dent in the center of each cookie. Then fill the dent with jam or jelly. Place back into the oven for 3-5 minutes, or until lightly browned, then devour these addictive beasts!*****************************************
Chokeballs
- 1 cup butter, softened
- 1/2 cup powdered sugar
- 1 teaspoon vanilla
- 2 1/4 cups flour
- 1/4 teaspoon salt
- 3/4 cup finely chopped nuts (walnuts or pecans are tasty)
- powdered sugar for rolling
Preheat oven to 350*F. Cream the butter, powdered sugar & vanilla until light. Add the flour & salt & stir until combined, then stir in the nuts. Roll mixture into 1-inch balls. Place on a cookie sheet (don't worry, they won't spread much at all) & bake for 15-20 minutes. Remove from oven & roll in the powdered sugar. Let cool, then re-roll them. Sometimes I give them a third roll, if I'm feeling saucy.
*****************************************
These next cookies were a first for me, but they were very good! I got several compliments on them, so I plan on making them again next year. The only thing I would change would be to add more salt to them. I made the dough a little differently too...
Chewy Gingerbread Cookies - 12 tablespoons butter
- 3/4 cup brown sugar
- 3/4 cup molasses
- 2 tablespoons milk
- 3 cups flour
- 1 tablespoon cinnamon
- 1 tablespoon ground ginger
- 3/4 teaspoon baking soda
- 1/2 teaspoon cloves
- 1/2 teaspoon salt (1 would double this next time)
Cream the butter, brown sugar & molasses until creamy. Add the milk & try to blend until it emulsifies as much as possible. In a medium bowl, combine the remaining ingredients & whisk them or sift them until they're blended. Slowly add them to the creamed mixture, stirring just until combined. Dough will be pretty sticky. If it's too sticky, chill it before rolling. If it's workable, roll it out, with a teensy bit of flour, until it's 1/2-inch thick. Wrap & chill for a couple hours or overnight.
Preheat oven to 350*F. Use cookie cutters to cut desired shapes & quickly put them on a cookie sheet (an inch & a half apart); bake for 8-12 minutes, rotating sheets halfway through. They are done when a gentle finger pressed into the center barely retains a fingerprint. One sheet of mine was a bit underbaked, so I put them back in for a couple minutes, which worked just fine. If you cook them too long, they won't be chewy, but they'll still taste good!
*****************************************
English Toffee
- 1 cup butter
- 1 cup sugar
- 1/3 cup brown sugar
- 2 tablespoons water
- 6-8 ounces dark or milk chocolate for spreading (amounts depend on taste)
- about 2 cups finely chopped nuts for sprinkling
Line a sheet pan with parchment & set aside. In a heavy-bottomed saucepan, melt the butter; add sugars & water. Stir, over medium heat, until it reaches a boil. Turn heat to somewhere between medium-low & medium. Don't stir very often, or you could summon the dreaded ~crystals~.
Stick your trusty candy thermometer on the side of the pan, careful to not let it touch the bottom. When the mixture reaches 300*F, it's ready. Pour it onto the parchment, WITHOUT SCRAPING THE PAN. There will be some candy left in there, but if you scrape the sides, you risk incorporating some sugar crystals into your toffee, which could cause the whole thing to crystallize. I know, it's a high stress situation, this toffee-making, but it's worth it. You can sort of lift & tilt the cookie sheet & allow the mixture to spread a bit, if you want it thinner.
Once it cools, melt some chocolate & spread it on the toffee. Sprinkle some chopped nuts on top of the chocolate, pressing them into it. Let the chocolate harden, then turn it over & repeat the process on the other side. When that side is hardened, break it into pieces & try not to eat it all!
*****************************************

 Yesterday, Smels came over, so I could show her the Wii---yeah, I've wanted one since they came out, & I couldn't resist any longer! :) I made her some Jammers, which are her favorite treat from Grand Central. She said they were perfect, yay! I didn't cut the jammers into circles, because I didn't want to deal with scraps. It just seemed simpler to form the dough into a rectangle, then cut it into 12 squares.
Before baking:

Grand Central Bakery Jammers
- 4 cups flour
- 3 tablespoons sugar
- 2 teaspoons baking powder
- 1/1/2 teaspoons salt
- 1 teaspoon baking soda
- 1 cup cold unsalted butter, cut into pieces
- 1 1/4-1 1/2 cups cold buttermilk (I squeezed the juice of one lemon into a measuring cup, then topped it off with 2% milk)
- about 3/4 cup jam (I used peach-lavender & strawberry)
Preheat the oven to 350*F. Line a baking sheet w/parchment & set aside.
In a large bowl, combine the flour, sugar, baking powder, salt & baking soda. Add the butter pieces & work it into the dry ingredients until teh mixture is mealy, with some quarter-sized pieces of butter remaining. Try not to let it get warm from your fingers; work quickly & pop it into the fridge if you think it's getting warm.
Pour 1 1/4 cups buttermilk onto the flour/butter mixture & work it in with your fingers. It's should be pretty dry, but hold together (sort of like a drier pie dough). If necessary, add more buttermilk, a tablespoon at a time.
Dump dough onto your counter. Pat it into a rectangle that's about 2 inches thick. Cut into 12 squares with a sharp knife. Carefully transfer the squares to your baking sheet (they're flaky & delicate at this point), spacing them about 1 1/2 inches apart.
Use your thumb to make an indentation into the jammers, & fill them with about 1 tablespoon of jam. Bake for 35-40 minutes, rotating the baking sheet halfway through. They're done when they reach a deep golden color.

FINALLY!!! This project has haunted me, because I just couldn't get motivated to finish it. I even dragged its components through several moves! The table was found outside a dumpster, back when I lived on Belmont & walked to Movie Madness one night. My brother, Ethan & I took turns lugging it back up the hill to 60th because I saw its hidden potential.
Before:
 It actually looked worse, because the shards of varnish were peeling off unevenly. This is about halfway through the sanding process.
And after!:
 After sanding off the 70s varnish, I hand-blended a few colors of acrylic paint to get just the right shade of blue, then sealed it with a couple coats of Krylon UV-Resistant Clear Acrylic Coating.
The Mario part was made from bits & pieces of this awesome chart from Sprite Stitch, & unfortunately, I stumbled upon this cleverly badass method, AFTER ironing of the sections individually. D'oh! There are some visible spaces between some of the sections, but I'm not sure I'd be into investing that much moolah on zillions of Perler pegboards to avoid that flaw.
Oh well, if it were perfect, I'd be afraid to use it, right?! I kind of improvised the top section because I was running low on certain colors of Perler beads at that point, & came up with the Nintendo emblem on my own, since the original was too large. The ironed Perler pieces were glued on with Beacon's Mosaic Glue (& weighted down for 24-36 hours, a few at a time), that I found at JOANN's. It says it's suitable for ceramic, glass & plastic, so we'll see how it holds up. So far, so good!
Here's the top tier:

And here's the bottom level:
 I LOVE IT!
I've also been working on this owl cowl, which is so cute! The two-handed fair isle method isn't too hard, once you practice a bit. Much quicker than one-handed, in my opinion. I'm using smaller needles than the pattern recommends, because many people on Ravelry thought it came out too big.
 Even more craftiness! My sister came over a while back & we were carving stamps & making Halloween cards. I really like this one that I made for a friend's b-day.
 Ooh, for my meditation class, we get to do an assignment where we tune out technology for 3 consecutive days! I'm super excited, because I'm way too dependent upon the internetz for entertainment & need to get back into reading. How can I live without watching Hoarders, Hell's Kitchen, & Fringe?! We're allowed to use computers for work or school, but nothing else; no personal e-mails. And phones are to be used as land-lines---no texting, only talking to people when you're actually at home. No radio, no podcasts, no MP3 players, no DVDs, no nothin'!
I can't wait to challenge myself this way & hope it inspires permanent change within me. My professor warned us that we may experience severe discomfort at first, but to be mindful of how we feel. Not to trivialize actual addiction, but there are definitely some similarities between our excessive use of gadgets & other addictions. They can often distract us from the present moment & cloud our awareness & emotions! I'm telling myself that this Friday, Saturday & Sunday will be best, since I can get a lot of homework done & I'll actually be home most of the time. Plus Ethan will be home too, so I won't feel as lonely & depressed, ha ha. :)
This is the infamous Buttony Sweater, by Katie @ Oh My Stars.
 She has a free guide to knitting a custom-fitting, asymmetrical, bulky-yarn sweater. Years ago, I made a magenta one, but the asymmetrical thing just didn't look right on my chest...at all. I think it looks better on smaller folks, but that's just my opinion. I recently frogged that one & cranked this version out It's a more traditional, down-the-middle cardigan. I love it & have gotten several compliments on it already! I didn't add any waist shaping, so it's one of those comfy, warm, non-form-fitting sweaters.
 I'm planning on making another with my magenta yarn, but I want to see how this yarn holds up, & whether or not it'll stretch out or anything. That way I can make the next one a little smaller.
And, for some reason, I've never taken pictures of my cell phone cozy, so I wanted to add it to my Ravelry projects page. It's cute, but it's always floating around in the bottom of my backpack, hidden from human sight, including mine. Poor little mushrooms. :(
 This weekend is rare, in that I have zero responsibilities! Ethan & Ruben are visiting his parents, & I don't have to work or dog-sit, so I can put my feet up & just chill. So nice. My sister is coming over later for a slumber party, & we're gonna craft our asses off, make enchiladas, & watch The Avengers. What could be better?! After this, I'm going to decorate the house for Halloween, which is also Mom's birthday. This is so fun! Happy October, everyone!
I've been squeezing the last little bit out of my summer break by finishing projects & little odds & ends that have been cluttering up my life. It feels so freeing!
Firstly, I've finished knitting my second sweater. The first one didn't fit too well, so I've frogged it. At least I can use the yarn for another one! This is the "Cozy V-Neck Pullover w/Deep Ribbing" from Fitted Knits, by Stefanie Japel. What's so great about this pattern is that the ribbing does the shaping for you. It's really flattering in the waist department & is a great basic sweater.
 Another thing I did was repair my Nintendo! When Sage was visiting, we played the hell out of it & it finally started to have problems when we'd switch cartridges. We ended up having to jam a particular book into it to hold the game down far enough to make contact w/whatever parts are necessary for play. I found this great place & ordered the repair kit. Using their photo guide, I was able to get in there, clean it out, & replace the 72 pin cartridge connector, which apparently wears out in 25 years or so, ha ha.
Here's the best picture I took. I was too busy cussing to take more!
 It took an hour, at the most, then I ended up w/a happy NES, ready for 25 more years of action!
 Another thing I got done was the "butchery" of our tomato plants. Coral recommended I trim the shit out of them, so they'd put their energy into ripening the stragglers. I hope it works! For some reason, I feel guilty pruning plants. :( Here's the latest batch I picked.
 Ethan & I have been watching X-Files, but this puzzle got us hooked to the point where we were putting it together WHILE watching it. Horrible! This is from Goodwill, & stated on the bottom that there were two missing pieces. Whoever donated it is so sweet to write that on there!
 We came up with the idea of replacing them with cardboard (traced, then cut w/an Exacto Knife), then painting them to blend in. I think it worked really well! You'd only be able to tell if it were pointed out. I Mod Podged it a bunch, then hung it on the wall this morning. Cool!
 Speaking of mushrooms & Goodwill: Mom bought these giant garden shrooms for me, when she was visiting last time. I LOVE THEM! They're originally from Target, but our Goodwill gets a lot of their close-out & remainder items, so you can sometimes get new shoes & stuff for a steal.

I also mended my sister's slipper that her kitty chewed a hole in:
 Other tasks I completed: cleaned my room, washed 3 loads of laundry, made fruit leather out of a box of pears from Coral, backed up all my photos to Flickr & DVD, plus sold a bunch of old books on Amazon. I am officially declaring my old habit of procrastination OBSOLETE! If it feels so good to catch up on things, imagine what it's like to feel that way ALWAYS!
We have finally used up the 67 or so pounds of peaches that we picked! It was no small feat to process &/or eat so many golden, juicy globes, believe me. I made 9 pints of peach sauce, which is similar to applesauce (or baby food!). It's really good, with a hint of cinnamon & the bare minimum of sugar. The downside is that it's runnier than applesauce, but I didn't want to cook the piss out of it & kill any & all vitamins, so whatevs.
 The other night, Sage & I made peach crisp, which was EXCELLENT. We combined a peach pie filling recipe w/the crisp topping that I always use for apple crisp. We ended up with 3 individual ramekins, plus a large casserole of it.
Excuse the bad night-time photo:
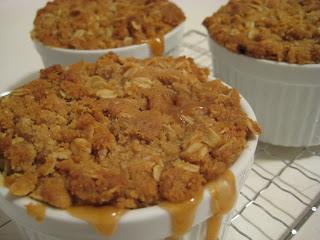
 Here's the recipe, if you want to try it. I cut the sugar down a bit, since I like the fruit to be on the tart side, which is balanced well by the buttery, sweet topping. You can make it sweeter if you like it that way.
Peach Crisp
Crisp Topping:
- 1 cup oats
- 1 cup flour
- 1 cup brown sugar
- 1/4 teaspoon baking powder
- 1/4 teaspoon baking soda
- 1/2 cup butter, melted
Peach Filling:- 4 pounds ripe peaches, peeled, pitted, & sliced***
- 2 tablespoons lemon juice
- 1/4 cup flour
- 1/4 cup cornstarch
- 3/4 cup brown sugar
- 2 teaspoons ground ginger
- 1/4 teaspoon cinnamon
- 1/4 teaspoon salt
Preheat the oven to 350*F. Make the crisp topping by combining all the ingredients in a medium bowl; set aside. Combine the peaches & lemon juice in a large bowl, then mix together the dry filling ingredients (flour, cornstarch, brown sugar, ginger, cinnamon & salt) in a small bowl. Dump the dry ingredients over the peaches & combine them gently. Pour the juicy peach filling into whatever baking dish(es) you're using, then sprinkle the topping over it. Bake until the topping is golden & the filling is bubbly. Let it cool a few minutes before devouring, because it would be a shame to damage your taste buds before you could enjoy this feast!
***hint: The easy way to peel peaches is to cut a little "X" into the bottom of them, then toss a few at a time into boiling water. Leave them in for about a minute, then plunge them into cold water. This will allow you to slide the skin right off. Cool!
Our garden is trying its damnedest to grown & ripen, but we get so little direct sun, due to the ginormous tree outside our apartment. Imagine my excitement when I saw this little tomato the other day!
 Most of the others look like this:
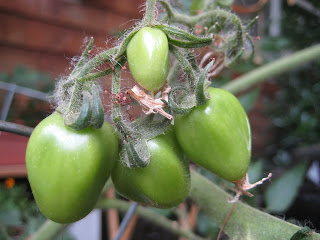
 I'm really hoping that the red one sends out some hormones or something that will kick-start the rest, otherwise we'll be eating fried green tomatoes & canning green tomato relish. C'mon, babies, go!
Here's a cute succulent terrarium I made recently, using a cool goblet I found at Goodwill. I really like how it turned out.
 I've also been knitting this Circle Sock for myself, which is reminiscent of a TMNT shell. Turtle power!
 Noodle (Ruben) is doing much better, after a rough patch of health. He's been loving to sunbathe on the porch during our more temperate days.

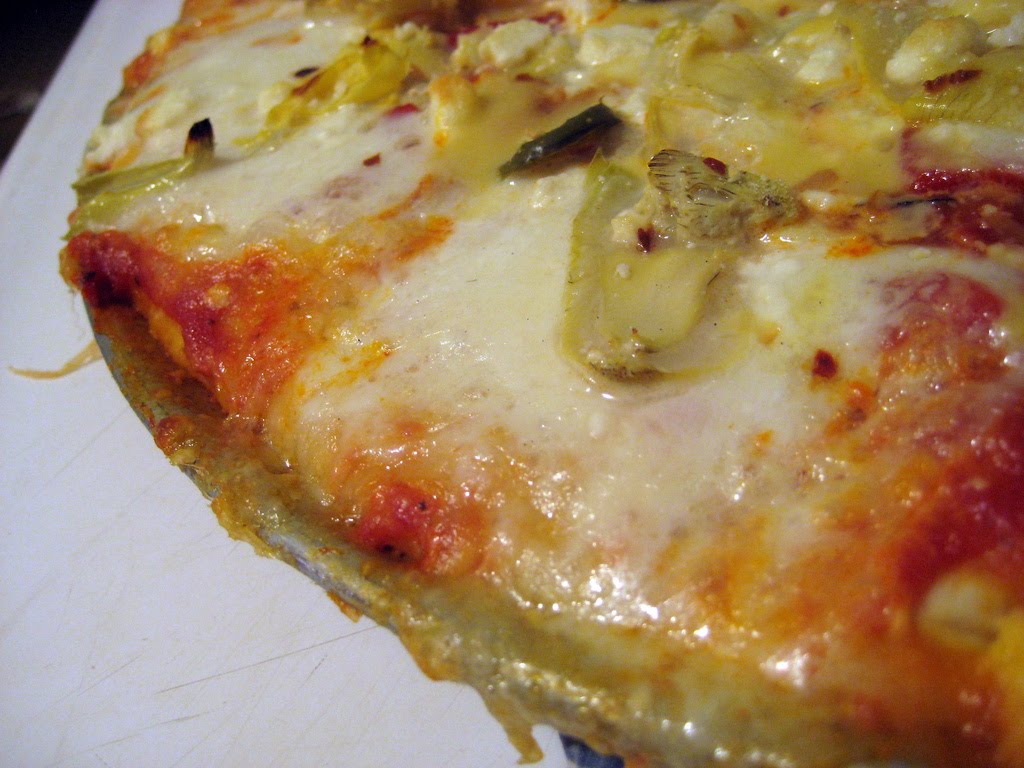
I've been bad about posting because we've been like a bed & breakfast up in here, but I had to write about this tasty pizza we made. We usually just use whatever we have around the house, but this time everything came together to sort of taste like pepperoni!
 We used homemade dough (from Martha), then covered it in sauce, feta, artichoke hearts, roasted red peppers, fresh mozzarella, pickled jalapeños, smoked gouda & red pepper flakes.
 The cool thing is is that most of those ingredients were free or nearly free, & they turned into one of the tastiest pizzas we've ever made.
 I also made a hat from the book Hip Knit Hats, which I checked out from the library. Warning: see this errata page, if you get an earlier edition of the book.
 The hat is called "Ella" & is an entrelac pattern, the second one I've made. (Well, the first project was a scarf that I didn't like, so I ripped it out before finishing it.) I love it, even though I'm not a "hat person."
Very unenthusiastic modeling shot: